 |
[ Home ] [ 1st Visit ] [ Tandem Display ] [ Accessories ] [ Parts ] [ Close-Outs ] [ Ordering Info ] [ About Us ] [ Links ]
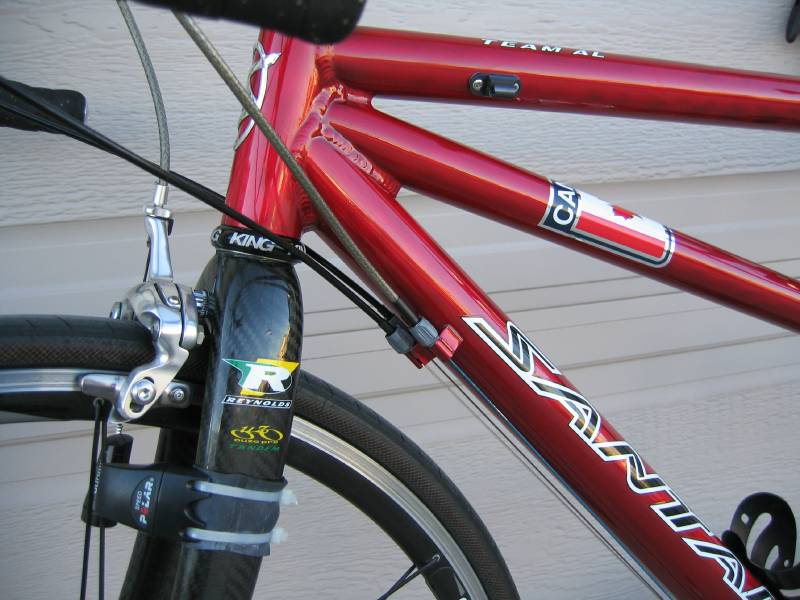
Santana Team AL with Avid Disc Brake(The featured tandem was originally setup from the factory with a Formula hydraulic brake. A tandem having rim brakes would not have the hydraulic line fittings or braze-ons in place on the frame.)
Copyright 2003. All rights reserved. |
Webmaster note: Many thanks to Bryan for putting together such an excellent resource and for his permission to post his work on this site.
It seems a number of people this year have
asked if it was possible to install an Avid disc brake on a Santana tandem, and
for information on how to do it.
Let me start by first thanking Brian Jensen for his assistance with the Avid
Disc brake install.
Next, I put together these photos along with a few words in the hope that
this helps a few fellow riders with their quest.
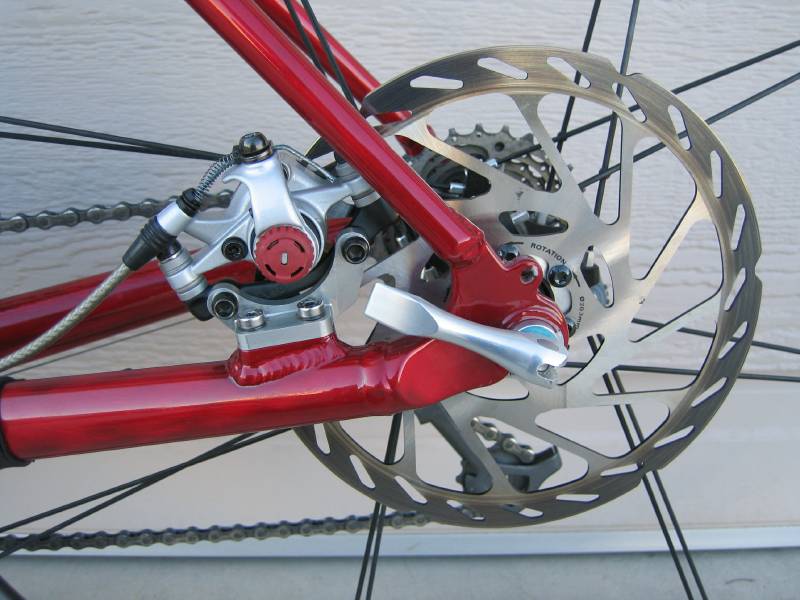
Gotcha #1 - Mounting the caliper to the bike:
Which caliper? As a side note, I have a Road bike tandem so
these instructions are geared toward that implementation.
Using a standard Avid Mechanical Disc FRONT ROAD
caliper, simply mount it to the Hayes-International Standard adapter provided by
Santana. The adapter (the silver "U" shaped thing attached directly to
the bike frame) has plenty of adjustment capability built into the base/frame
mount point and at the caliper mount point. It comes with the two hex screws
too. Why the FRONT Avid caliper? Both the front and back Avid disc calipers are
identical, except for the black mounting adapter supplied by Avid. The front
adapter brings the caliper closer to the frame, which when mounted onto
Santana's adapter, puts the caliper over the rotor/disc in the correct position.
When you are ordering a complete kit, order an Avid Mechanical Road Front, then
mount it on the back of your Santana tandem.
Now the trick for road bikes is that Avid does
not package a 203mm disc rotor with their Road calipers and of course, it's the
203mm that you want. Only the MTB downhill kit comes with a rotor this size, so
you end up having to order the 203mm rotor separately from the Front Road kit.
The Avid Road kit comes with a caliper, the black IS adapter with mounting
screws, a 160mm rotor and the CPS (caliper positioning system) set of washers.
Brake pads and red adjustment knobs are already installed. As I mentioned, you
can get a Mtb DH kit complete with the 203mm rotor, which is the cheapest option
if that is the kit you want (for road bikes just add one of the cable boosters
mentioned above).
An easy source for the Santana Hayes-IS adapter
and the other components you need is Mark Johnson at
Use the Avid Road caliper for Road style brake levers, or the Mtb caliper for
Mtb brake levers. The only difference between the two, is the "throw
arm" (otherwise called an actuator). Since road levers don't pull as much
cable as Mtb levers, this is why they make a different caliper. However, you
could probably still use the Mtb version with your road levers, if you add an
inline assist component like a Travel Agent or Brake
Power Booster. You'll just have to
decide how you will run the cable and where you would put one of these boosters.
|
Gotcha #2 - cable routing:
The standard mount point for the rear caliper is on the seat stay, however,
Santana puts theirs on the chain stay. The later is probably better technically,
because when a disc brake is applied the rear wheel is forced up into the
dropouts (this is a good thing). Conversely, when the mount point is on the seat
stay, braking forces combined with wheel/road traction try to kick the wheel
down and out of the rear dropout (a bad thing). So why is the seat sstay the
standard? Because it's the easiest for manufacturers to provide space for. With
all these new and weird rear suspension configurations, some bikes don't even
have a chainstay.
The issue is this, when mounted on a Santana, the cable comes out of the Avid
caliper pointing downward which prevents running the cable up the seat stay as
most disc brake equipped bikes do.
For cable routing you have a couple options:
1 - If you have a cable stop on your stoker's top tube, you can route the cable
in a big "S" up there, and you're all set.
2 - If you have hydraulic cable guides supplied by Santana, don't sweat it, just
follow the same route they provided. However, we'll have to do a little work on
the underside of the bike to provide a cable housing stop.
 |
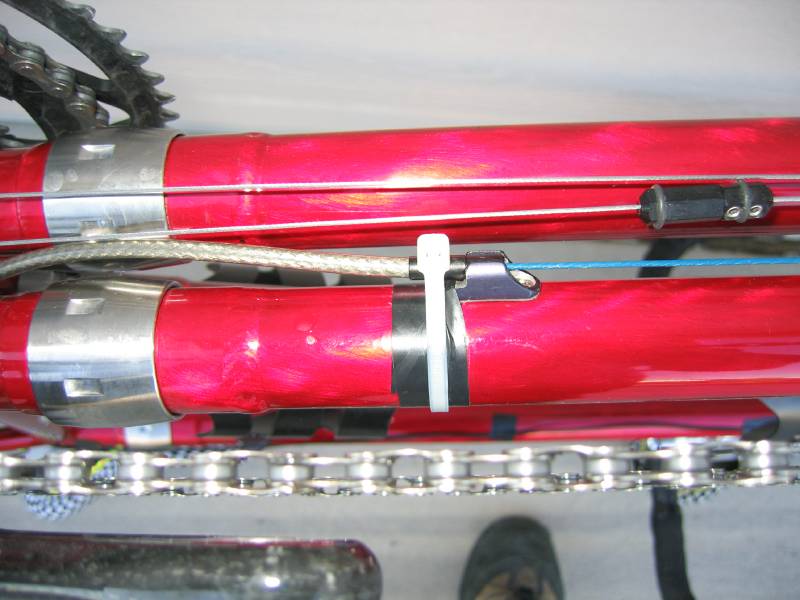
Gotcha #3 - providing a cable stop:
Ok, with this dual bottom tubed frame you could slap on an aftermarket cable
stop. But who wants to add a chunky piece of hardware to their bike? Not me.
Come a little elbow grease and even less skill... using a file and drill.
My quick solution:
Note on the right side of the hydraulic guide, how sloped the entry point is.
Now look on the left side and you will see that I filed the shoulder flat at a
90 degree angle. This is to provide a flat mating surface for the cable housing
end to rest against. Whew, anyone got a smoke?
Next, we find a cable housing end that will suit our purpose. In this case, I
found that along with the silver braided housing (outer layer is braided, inner
is coiled and then Teflon sleeved) I bought from Quality Bicycle Products, they
provided a package of step-down ferrules (fancy name for cable ends). The
benefit of the step-down, is that it provides a nice ridge in the ferrule which
I used as a stop point.
Ok, the inside walls of the hydraulic guide were straight edged, meaning, I
had to drill out the guide very slightly to accept the round ferrule end.
One last and slightly kludgie item... the zip-tie. Well, I'm a bit leery of
the cable slipping out of the modified guide, so I added a zip-tie to ensure the
cable end stays in place.
The clean way:
If you have an S&S bike, send your bottom tube to Santana and have them
swap the hydraulic guide for a standard cable stop. In my case with an aluminum
frame, the guides are simply riveted on, and they can pop on a new guide very
easily.
 |
 |
 |
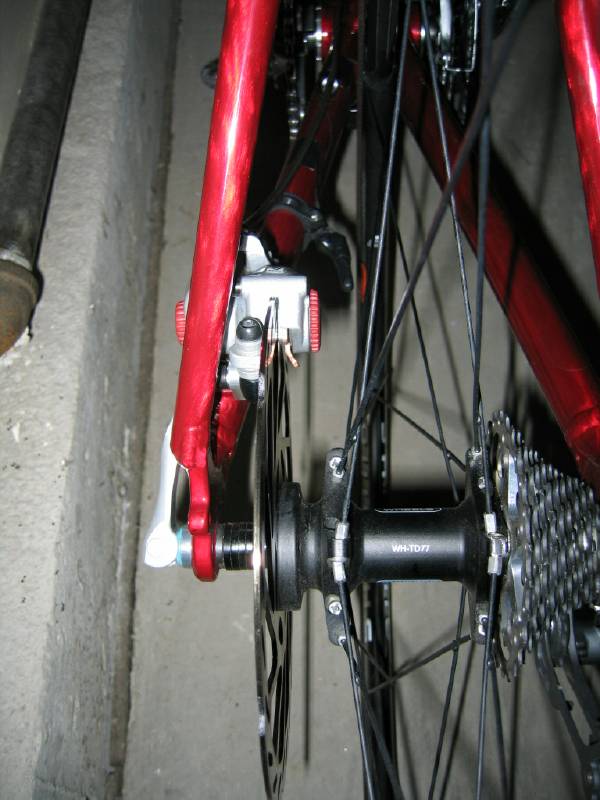
Inner shot out :^)
By this time you might be asking "What the heck is that spring doing
there over the inner cable?".
Even before mounting this system, I had heard that the return spring tension
on the caliper didn't pull all that hard. As a result you might have to run a
fairly slack cable tension. I phoned Avid and inquired about a possible solution
(at least a stiffer spring) but to no avail, although they did sort of admit the
cable pull tension was marginal.
Enter the additional expansion spring and a couple cable donuts at either
end. I'm calling this: B[ryan's] A[vid] S[pring] T[ension] A[ssist] R[etrofit]
D[evice], otherwise known as the BASTARD solution.

Webmaster note: The picture above and the description below have been updated resultant of an internet post made by Brian. We are pleased to pass it on.
If you desire a firmer brake lever feel, here's my latest "helper spring" for the Avid disc caliper. Get a package of 1/4" x 1" compression springs at Home Depot for about $1.50 then snip one to 3/4" long. Get a small washer and put an "S" bend in it to keep the spring from creeping over the caliper arm. Install as per photo...
Presto, much more back pressure on the caliper arm and increased ability to tighten the brake cable (remove slack). It looks simple, because it is.
Last but not least, a typical barrel adjuster at the head end.
 |
[ Home ] [ 1st Visit ] [ Tandem Display ] [ Accessories ] [ Parts ] [ Close-Outs ] [ Ordering Info ] [ About Us ] [ Links ]